Smart Contracts: What They Are and How to Build Them for Your Business
Maria Cecília Romão Santos | Jul 08, 2026

Deploying applications to AWS has a reputation: powerful, flexible… and occasionally capable of turning a calm afternoon into an unexpected adventure. Between IAM roles, container images, and networking choices, it’s easy to feel like you need a map and a compass just to get a “Hello, world” online.
That’s where AWS App Runner comes in. It promises a simpler path: bring your application, point to a container or source repository, and let AWS handle the heavy lifting, including scaling, load balancing, and infrastructure management.
In this article, we’ll walk you through the process of deploying a FastAPI application on AWS App Runner, focusing on a clean, production-ready setup that avoids through how to deploy a FastAPI application on AWS App Runner, focusing on a clean, production-ready setup without unnecessary complexity.
If you enjoy fast APIs, fewer YAML files, and deployments that don’t require a ritual sacrifice, you’re in the right place.
Before writing any code, we need to set up a few basic resources in AWS. These configurations allow App Runner to pull our container image securely and run the FastAPI application.
First, create a repository to store the Docker image for the FastAPI application.
After creation, copy and keep the Repository URI. We’ll need it later when building and pushing the Docker image.
App Runner needs explicit permission to pull images from Amazon ECR. We’ll grant this access by creating an IAM role.
{
  "Version": "2012-10-17",
  "Statement": [
    {
      "Effect": "Allow",
      "Principal": {
        "Service": "apprunner.amazonaws.com"
      },
      "Action": "sts:AssumeRole"
    }
  ]
}Code language: JSON / JSON with Comments (json)Read more: Building Neural Networks from Scratch
With the AWS prerequisites in place, we can now create the App Runner service that will run our FastAPI application. Follow the steps below:
Once the service is created and the deployment completes, App Runner will start running your containerized FastAPI application. From this point on, we can focus on adapting the application code to work seamlessly with App Runner.
Read more: Beyond “Vibe Coding”: Engineering with AI and Cursor
To automate the build and deployment process, we need to configure GitHub with the required AWS credentials and environment-specific variables. This will allow our GitHub Actions workflow to authenticate with AWS and push Docker images to Amazon ECR.
Using environments helps isolate credentials and apply additional controls, such as required reviewers or environment-specific secrets.
With the environment created, we can now add the secrets required by the CI/CD pipeline.
Make sure the IAM credentials used here have permission to authenticate to ECR and push images to the repository.
With the GitHub environment and secrets configured, we’re ready to create the GitHub Actions workflow that builds the Docker image and pushes it to Amazon ECR automatically.
Let’s start with the file responsible for instantiating the FastAPI application. The code snippet below illustrates a minimal FastAPI setup, exposing a single GET /health endpoint.
import os

from fastapi import FastAPI
from fastapi.middleware.cors import CORSMiddleware
from starlette.middleware.sessions import SessionMiddleware


app = FastAPI()

app.add_middleware(
    CORSMiddleware,
    allow_origins=["*"],
    allow_credentials=True,
    allow_methods=["*"],
    allow_headers=["*"],
)

app.add_middleware(SessionMiddleware, secret_key=os.getenv("JWT_SECRET_KEY", "default"))

@app.get("/health")
async def health_check():
    """Health check endpoint."""
    return {"status": "ok"}Code language: JavaScript (javascript)
Now, let’s take a look at the Dockerfile. This file is intentionally simple: it installs the dependencies using the uv package manager, sets the working directory, and invokes the entrypoint.sh script. Pay special attention to the exposed port, which must match the port configured in AWS App Runner (8080 by default).
FROM python:3.12.11-slim-bookworm AS builder

COPY --from=ghcr.io/astral-sh/uv:latest /uv /uvx /bin/

WORKDIR /app
ENV PATH="/app/.venv/bin:$PATH"

ENV UV_LINK_MODE=copy

COPY pyproject.toml uv.lock .python-version ./
RUN uv sync --locked --no-dev
RUN uv pip install --system alembic

COPY . .

FROM python:3.12.11-slim-bookworm

COPY --from=ghcr.io/astral-sh/uv:latest /uv /uvx /bin/
RUN apt-get update && \
    apt-get upgrade -y && \
    apt-get clean && \
    rm -rf /var/lib/apt/lists/* /tmp/* /var/tmp/*

RUN pip install --upgrade pip setuptools

WORKDIR /app
ENV PATH="/app/.venv/bin:$PATH"

COPY --from=builder /app /app
COPY entrypoint.sh /entrypoint.sh

RUN chmod +x /entrypoint.sh

EXPOSE 8080

ENTRYPOINT ["/entrypoint.sh"]Code language: JavaScript (javascript)
The docker-compose.yml file is also straightforward. It references the Dockerfile, exposes the container ports, and loads environment variables from the .env file.
services:
  singuessr:
    build:
      context: .
      dockerfile: Dockerfile
    ports:
      - "8080:8000"
    env_file:
      - .envCode language: CSS (css)
Finally, the entrypoint.sh script starts the Uvicorn server, listening on port 8080.
#!/bin/sh

set -e

echo "Starting application..."
uv run uvicorn main:app --host 0.0.0.0 --port 8080Code language: PHP (php)Github Actions
Create a file named .github/workflows/app-runner-deploy.yml at the root of your project and add the configuration shown below. This workflow defines the GitHub Actions pipeline responsible for the deployment process. It performs the following steps: authenticates with AWS, builds the Docker image, tags the image, and pushes it to Amazon ECR.
name: AWS App Runner Deploy Develop
on:
push:
branches:
- main # ← branch name
jobs:
deploy:
name: FastAPI deployment to AWS App Runner
runs-on: ubuntu-latest
environment: Production # ← Github environment
steps:
- name: Checkout
uses: actions/checkout@v3
- name: Configure AWS Credentials
uses: aws-actions/configure-aws-credentials@v2
with:
aws-access-key-id: ${{ secrets.AWS_ACCESS_KEY }}
aws-secret-access-key: ${{ secrets.AWS_SECRET_ACCESS_KEY }}
aws-region: ${{ secrets.AWS_REGION }}
- name: Login to Amazon ECR
uses: aws-actions/amazon-ecr-login@v1
- name: Build Docker image
run: |
docker build \
-t fastapi-app-runner:latest \
-f Dockerfile .
- name: Tag Docker image
run: |
docker tag fastapi-app-runner:latest \
${{ secrets.ECR_REPOSITORY_URI }}:latest
- name: Push Docker image to ECR
run: |
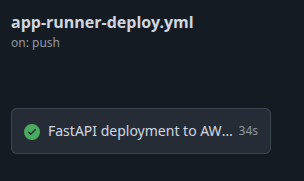
docker push ${{ secrets.ECR_REPOSITORY_URI }}:latestCode language: PHP (php)After committing and pushing your changes to the appropriate branch (in this example, the branch named main), you will see the workflow execution in the Actions tab. If everything is configured correctly, all steps will complete successfully.
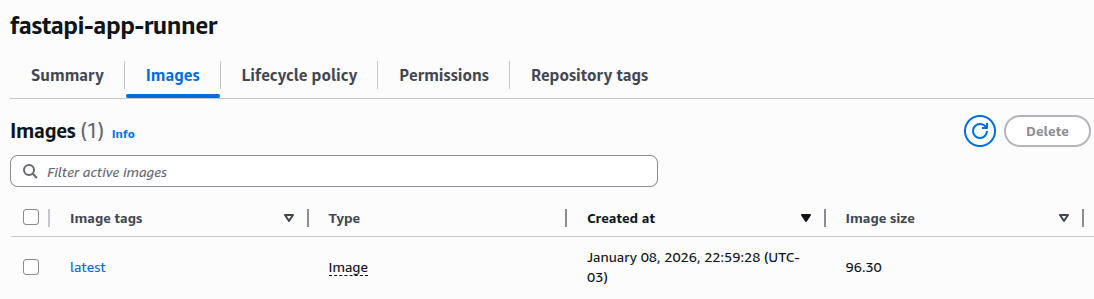
The final result is a Docker image available in your Amazon ECR repository.
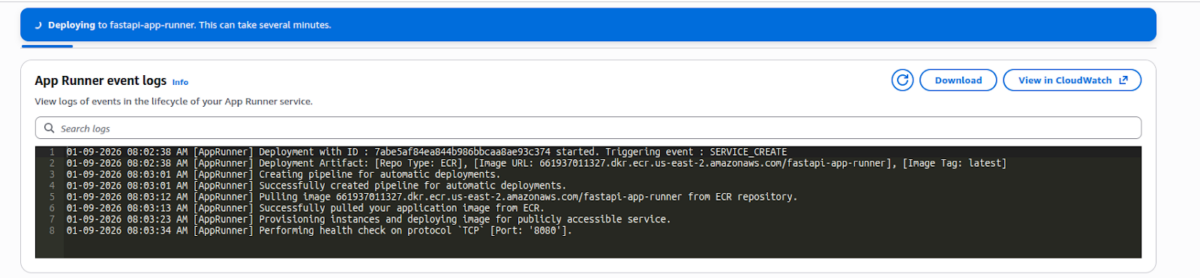
After you push your code to the branch defined in the GitHub Actions workflow, the App Runner deployment will be triggered automatically. You can monitor the deployment process and review all runtime logs directly in the App Runner service console.
The deployment should complete within a few minutes.
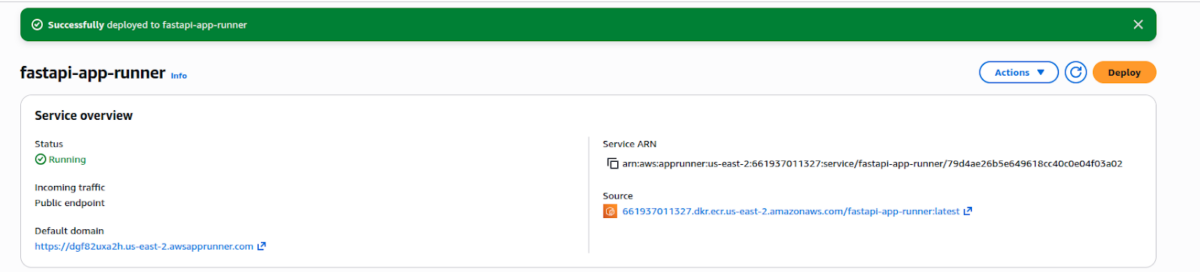
To test the application, access its URL by clicking the Default domain and, for example, request the /docs endpoint to view the API documentation.
AWS App Runner offers a compelling balance between simplicity and operational robustness. For containerized applications like FastAPI services, it removes much of the traditional overhead associated with infrastructure management while still integrating cleanly with the broader AWS ecosystem.
For many backend services and APIs, App Runner hits a sweet spot between fully managed platforms and more complex solutions like ECS or EKS.
Read more: AWS FinOps Best Practices: How to Cut and Optimize Cloud Costs
While this article focuses on a simple and functional setup, there are several areas worth exploring next:
In short, App Runner is an excellent entry point for running production-grade FastAPI applications on AWS. As requirements grow, you can progressively layer in more control and automation without abandoning the simplicity that makes App Runner attractive in the first place.

AWS App Runner is a service that lets you bring your application, point to a container or source repository, and let AWS handle scaling, load balancing, and infrastructure management. It works well for FastAPI because it offers minimal operational overhead, native container support with Amazon ECR, automatic scaling based on traffic, built-in HTTPS, load balancing, service isolation, and fast iteration cycles when combined with GitHub Actions.
Two main resources are required: an Amazon ECR repository to store the Docker image (for example, named fastapi-app-runner), and an IAM role with a custom trust policy for apprunner.amazonaws.com and the AWSAppRunnerServicePolicyForECRAccess policy attached, which allows App Runner to pull images from ECR.
In AWS App Runner, choose Create service, select Container registry as the repository type and Amazon ECR as the provider, paste the ECR repository URI with the :latest tag, set the deployment trigger to Automatic, select the existing IAM service role created earlier, provide a service name, keep the default settings, and click Create & deploy.
Create a GitHub environment (for example, production or staging) under Settings → Environments, then add the secrets AWS_ACCESS_KEY, AWS_SECRET_ACCESS_KEY, AWS_REGION, and ECR_REPOSITORY_URI. A GitHub Actions workflow file (.github/workflows/app-runner-deploy.yml) is then created to authenticate with AWS, build the Docker image, tag it, and push it to Amazon ECR on pushes to the main branch.
Store credentials only as GitHub secrets and never commit them to the repository. Use a dedicated IAM user or role with least-privilege permissions limited to ECR access. If possible, use OIDC-based authentication with GitHub Actions to avoid long-lived AWS credentials, which is more secure and better suited for production environments.